Architectural Fine Art Photography: How to create your own fine art shot

Architectural fine art photography is about finding something interesting in an ordinary place. We can take pictures of something rare or something that is normally hard to capture and transform it into a piece of art. In essence we have the ability to mirror our world around us. If you have a creative vision where you want to express an idea that you wish to share, a story you want to tell or an emotion that you want to evoke, then consider yourself delving into the world of architectural fine art photography.
Today I am going to be showing you exactly how I begin this journey through a series of steps. These steps will fall under the topics of: planning your day, capturing the moment and how to edit your photograph for the final result.
So, lets talk about how you can create your own fine art shot.
PART 1: Preparation-Behind the shot:
The first question you should be asking yourself is: what subject catches your eye? I decided to capture the Amsterdam Central Station.
Amsterdam Central Station is situated at the heart of the city and serves as the largest railway station in North Holland. This Neo-gothic or Neo-renaissance styled building, designed by Petrus J.H. Cuypers and Adolf L.Gendt between 1881 and 1889 makes for such an interesting subject choice. With several final destination lines of city trams and buses as well as waterfront stations of city ferry lines, it's no wonder this station is ranked second in the top ten busiest stations in the Netherlands.
The architectural aspects of this building really spoke to me. I chose to photograph this building because I didn’t feel like it was ever shown off to its full potential. My vision and how I wanted to portray this architectural piece was vastly different to those who had done it before. Instead of incorporating the subject within its natural habitat, packed with people passing by, I wanted the building to speak for itself. Completely isolated, separated from its busy and bustling lifestyle. Once I saw the subject I wanted, it gave me the urge to take this building and create something new.
My aim is to apply a technique that is mainly used for modern architecture on a historical subject. By doing this, the technique could develop into new ideas and give rise to a completely different scale of subjects.
Hundreds of people pass by and see this building but not everyone is really looking at it. They don’t see it for its potential. In fact, according to NL Times, over 190,000 people walk in and out of the station everyday. Even with Covid-19 underway, its busy.
My first piece of advice that I always follow and that I recommend to you, is that you need to prepare well.

You need to prepare and choose a position that will give you enough time to capture your vision. Not only should you focus on standing still for the frame but you need to keep an eye on who enters and exits through the frame as well as looking at your surroundings for safety precautions. You don’t want to get hit by a tram.
The first thing to note is that Google maps isn’t always up to date. In fact when I arrived at the scene, I noticed that the right part of the building was under construction while scouting on google maps it’s actually the left side that seems to be under construction. During my editing stage I will explain how I managed to resolve this.
To choose a space, I start by hopping onto Google maps.

Here are a few reasons as to why you should think about using it:
It’s easy to find out how to get there with Google maps. In fact I got there by cycling, but it’s always good to check the time it will take you to get to your destination as well as research alternative travelling options.
Architectural fine art photography is all about capturing a building in a different or interesting angle. Google maps can also be a good way to check how the building and facade is positioned. You can plan your shot and decide which compass points you would like to focus on (for example, north, east facing etc).
It can also be a great way to check where you could possibly shoot from. Do you intend to stand from a high vantage point looking down? Shooting from a low level looking up? Or maybe even straight on? For a detailed view, I would highly recommend an app called PhotoPills.
After you have chosen your position it is always best to check your safety in the surrounding area. For example, will any bikes, cars or trams be in my direct vicinity? What should I be aware of?
Once this is done I will make my way to the street view which is still within the app.

Street view, which is a magnified look onto the subject, gives you more of an idea of how you are going to shoot. It will give you guidance on how the light will fall on your subject, is it busy? What is the state of the building? You need to be asking questions like: are objects blocking the shot? Traffic, street lights or trees, power/tram lines or traffic lights? How much space do I have to manoeuvre? Left and right, back and forth? You need to be prepared for a number of factors before you even step onto your location.
Once I have an idea of how the shot could unfold and what primary angle might be, I then use PhotoPills, where I start planning out the shot’s second stage.
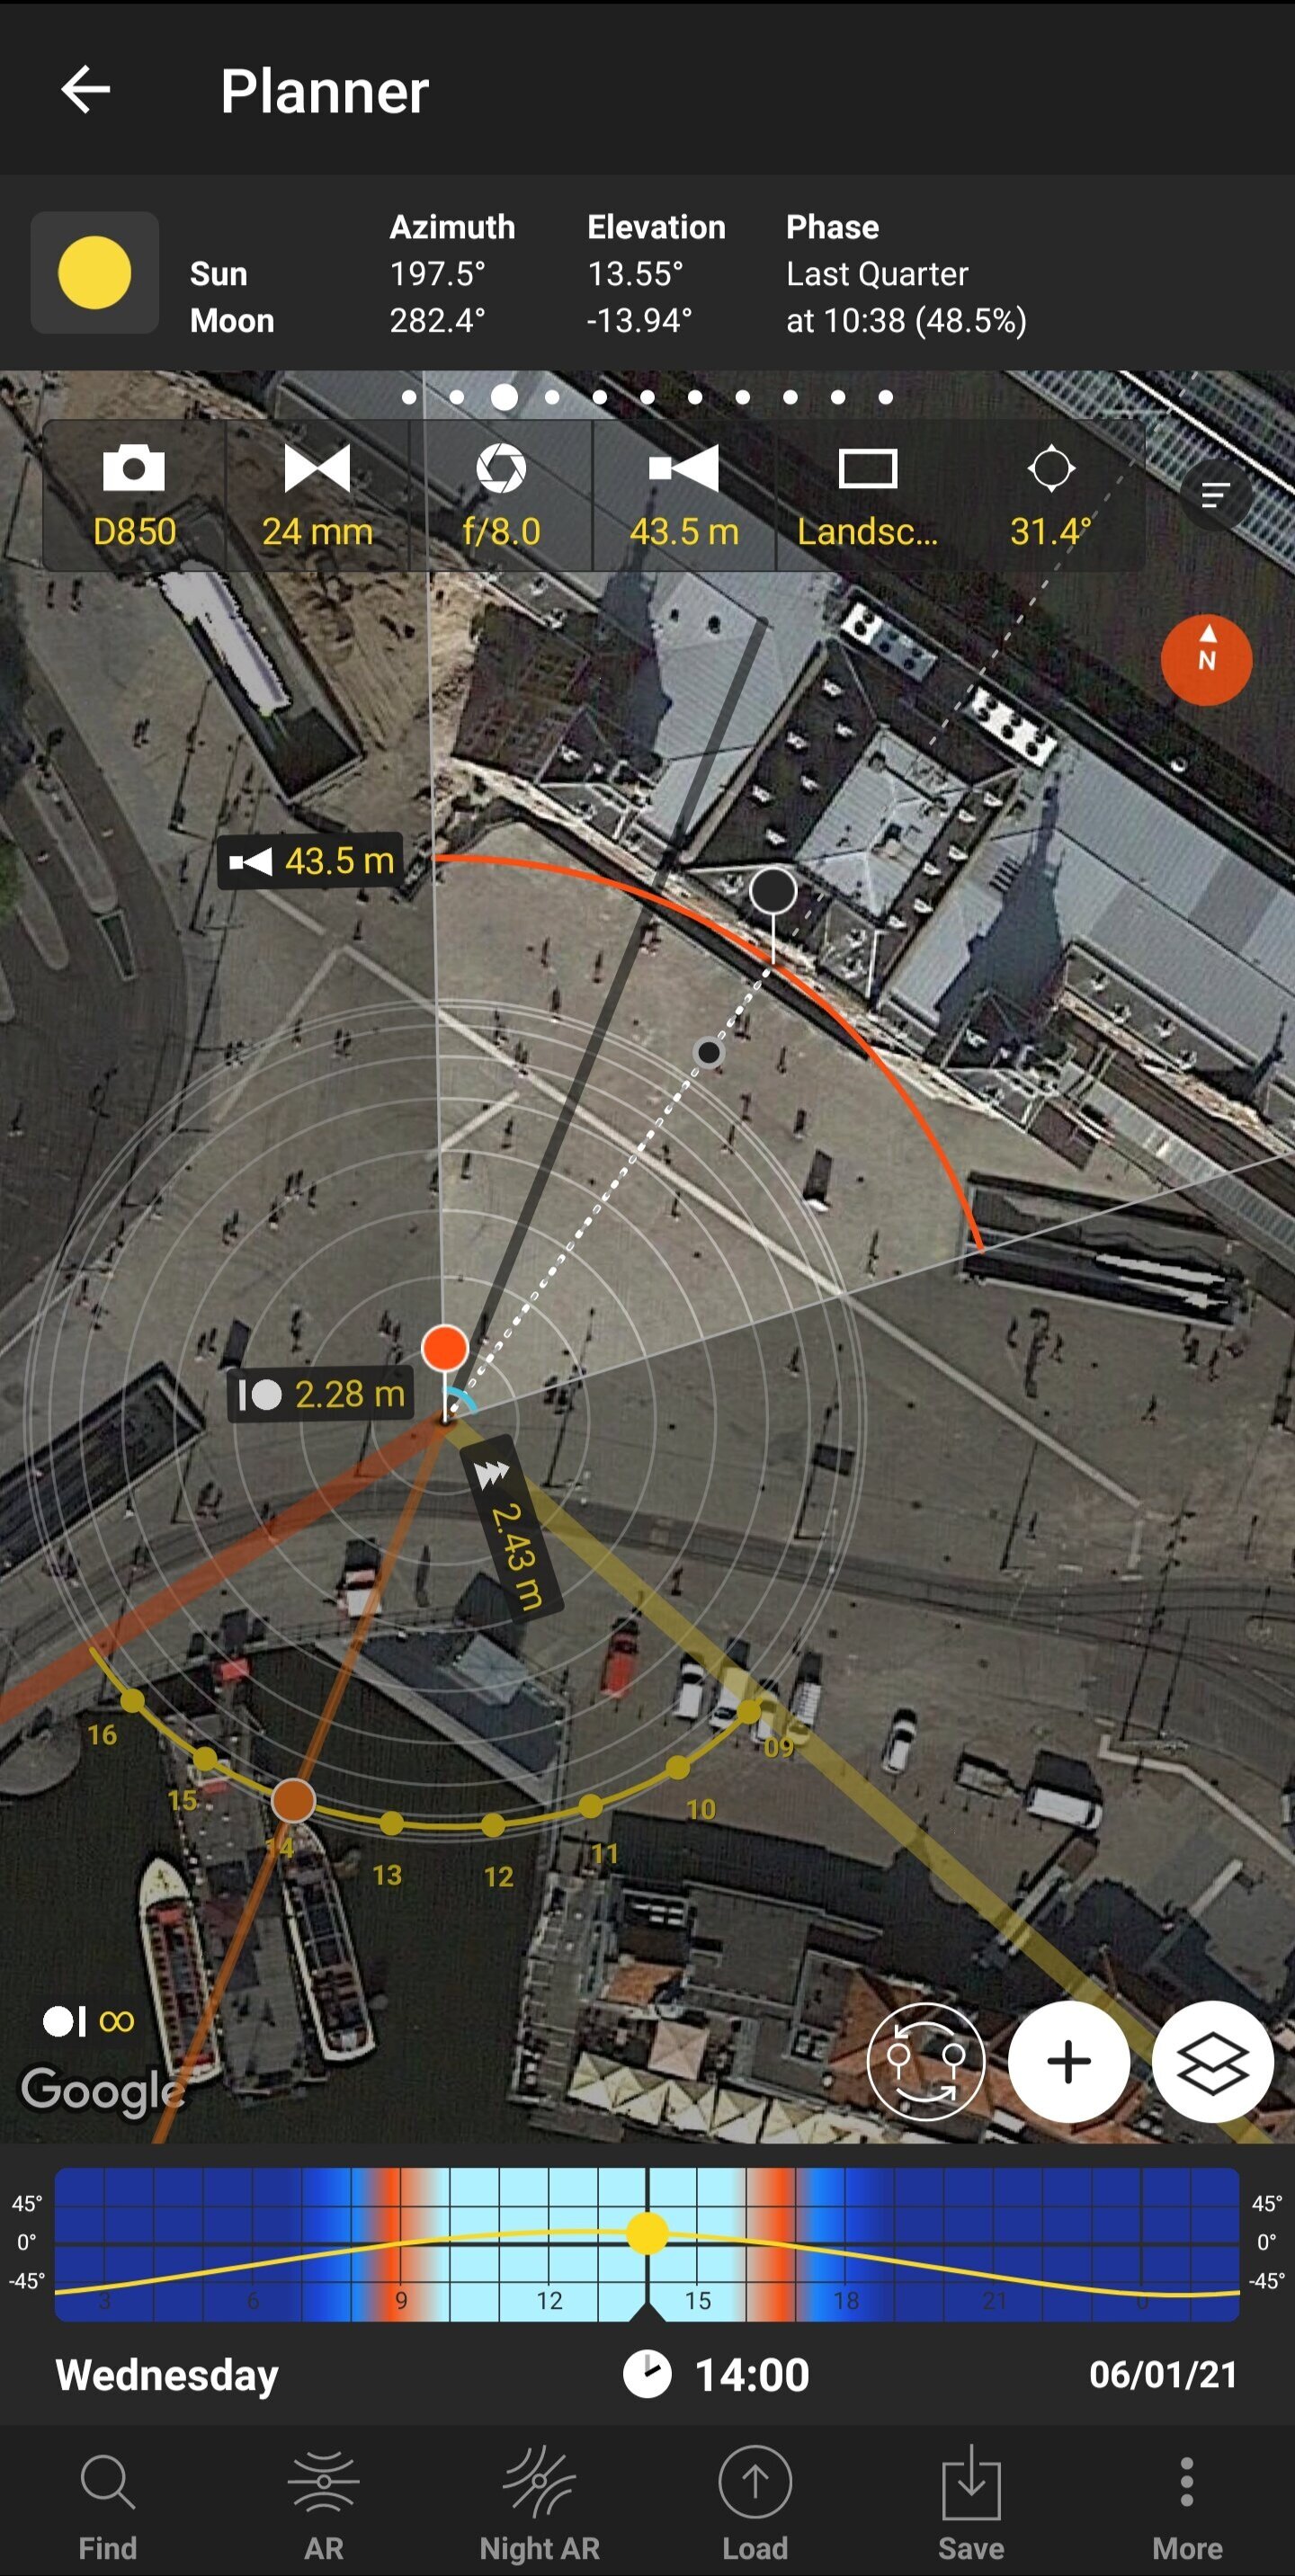
How to use PhotoPills:
Open up the application.
Drop the pin at the exact location you want to shoot from (in this case straight on to the facade).
I then measure the distance from the subject to where I will be standing (front of the facade). From here I will check the closest point to my camera (mostly a few feet away, unless I’m higher up) and the furthest point to get an idea of the depth of field I need.
You can add your camera model and the lens you are planning to use for the scene. In my case, I want the sides of the building to be in the frame as well so I’ll frame it up with my 24 mm tilt shift lens on a horizontal orientation. It’s really handy to check up front what you need to bring to get the shot you want. You don’t want to bring any gear that you're not going to use.
Next, you can check what position the sun and moon will have at a certain time of the day so you can make sure that the subject is lite in the way you want it to be. In my case I want to control the light in the final image as much as possible. This means that I’ll need a bit of flat light on the building so it’s balanced out.
Once I know what to bring and how to approximately shoot, I need to check on when to shoot it. My third planning stage is to check my local weather app - Buienradar.
Of course you need to plan exactly when you can make your way to the site. We all have quite busy schedules, so when we go we need to make sure we get the shot right. Sometimes you can’t re-do a shot if your in a fast paced environment, like on a trip for example. So, I will check my local weather app (Buienradar) for any opportunities that give me days with good weather conditions. Another app I would suggest using is called 'Clear outside’. This app, which is a free weather prediction app, was made by First Light Optics, is something that should belong in every photographers toolkit.
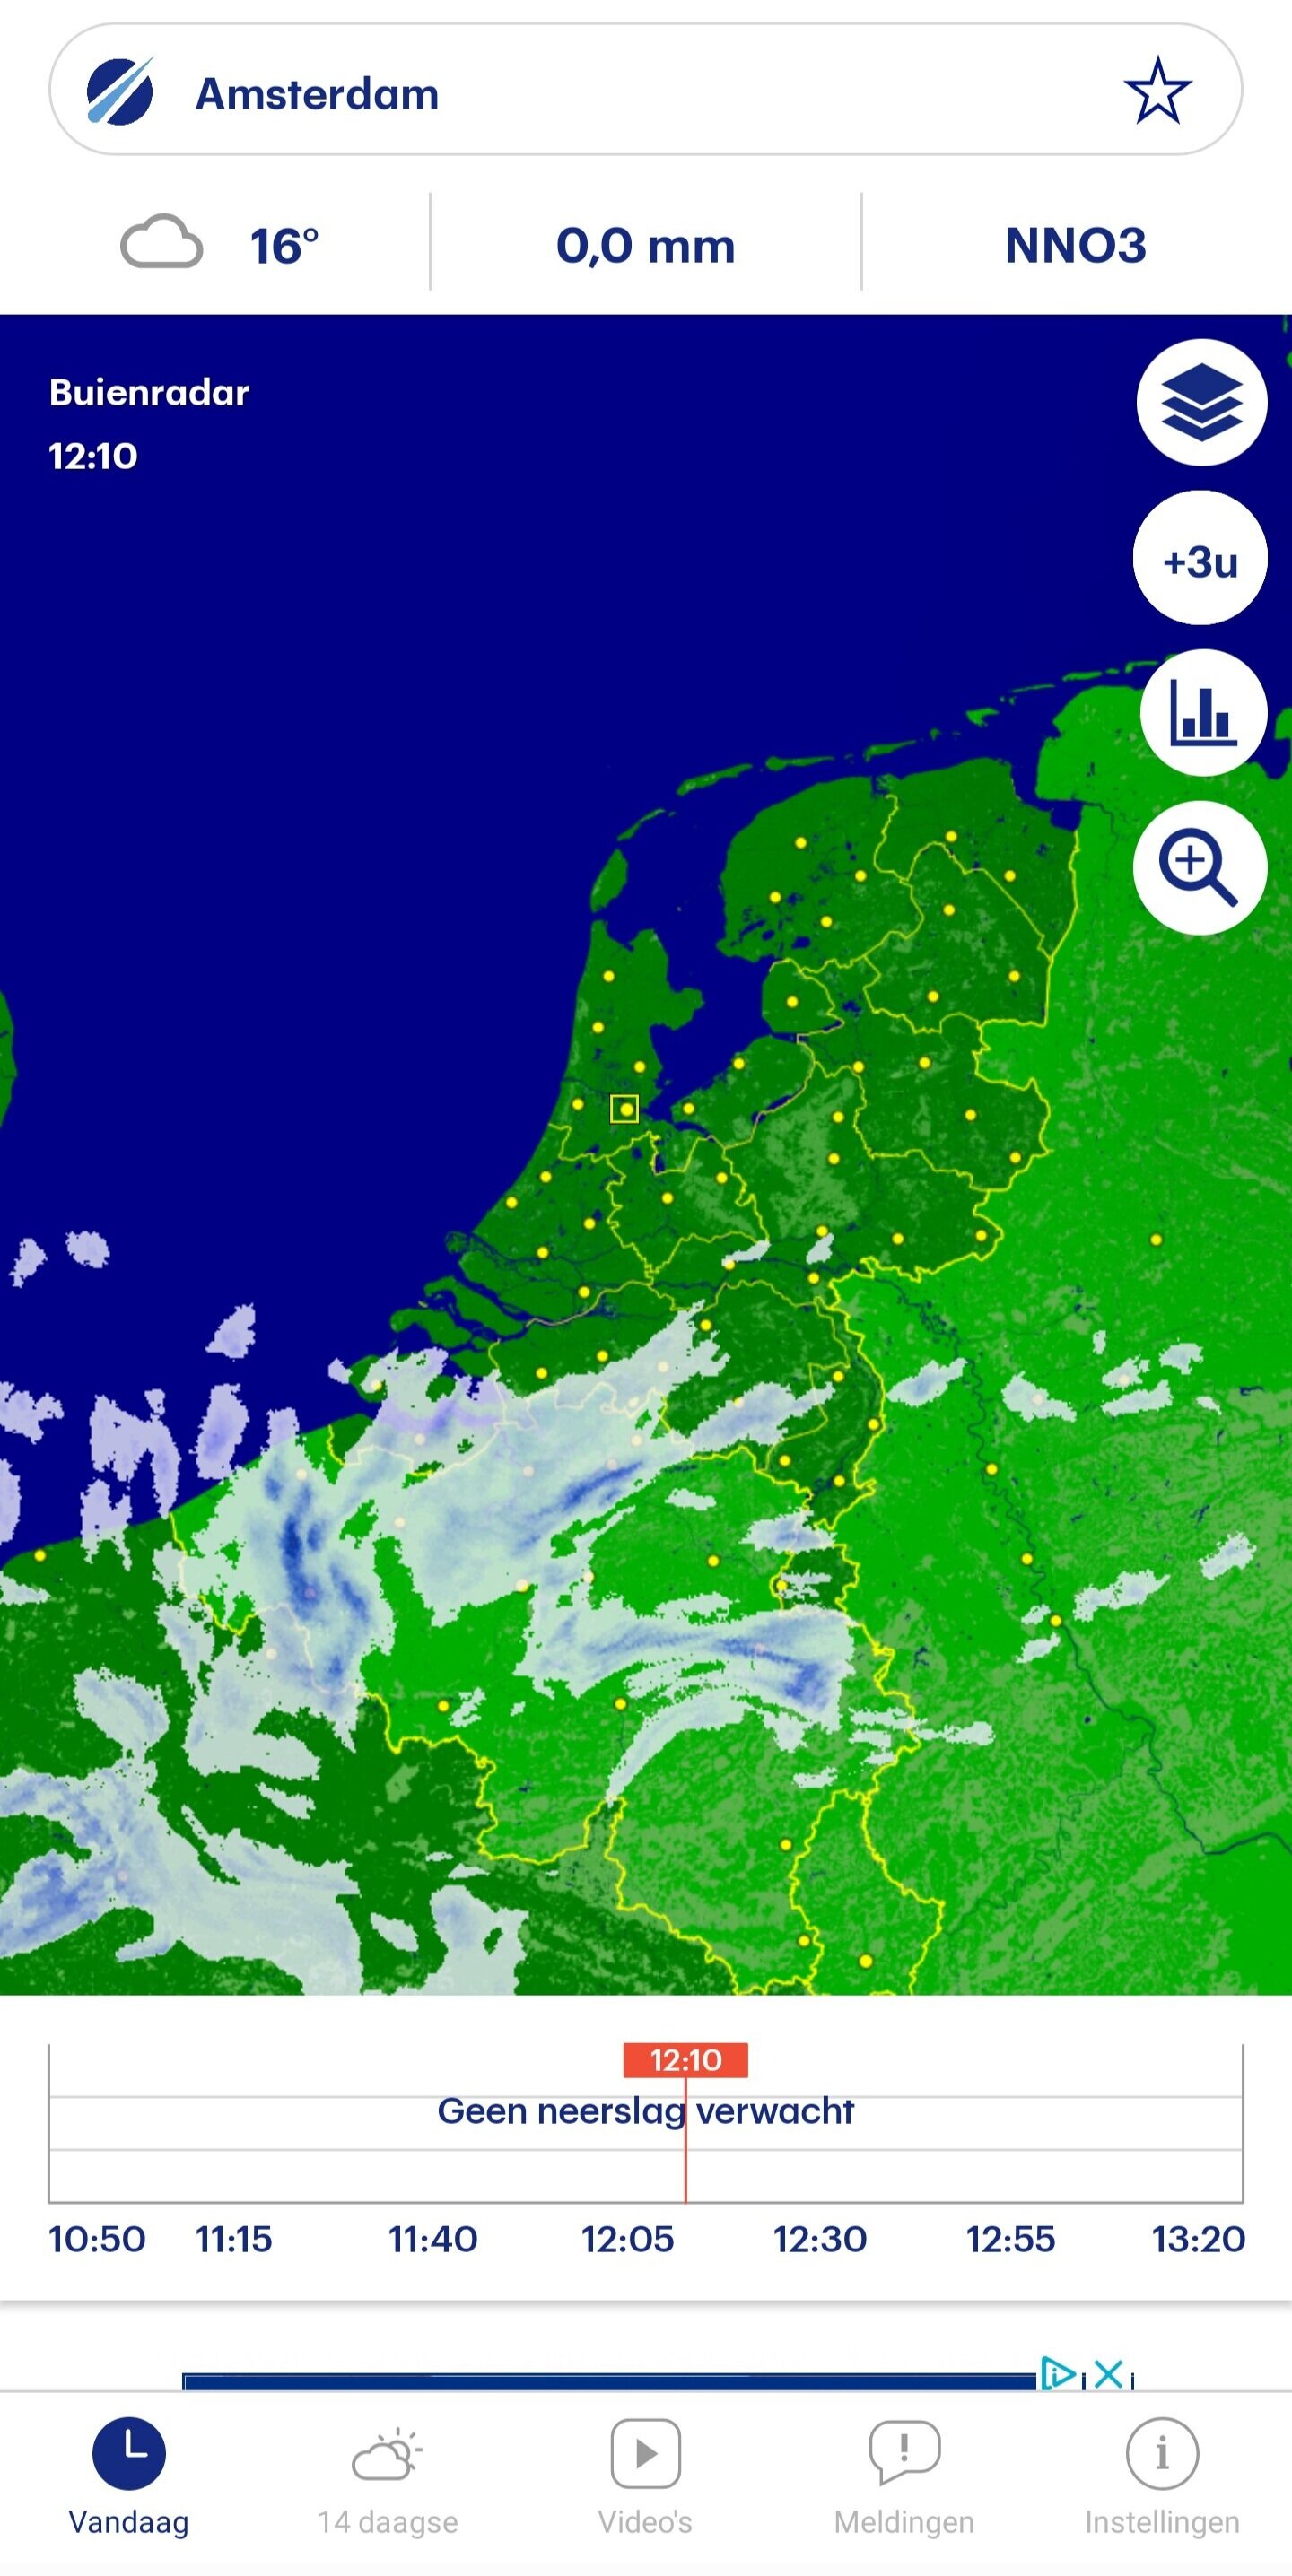
Buienradar, here are some things that I mostly check on:
Will there be rain? (do I want that yes or no) if so, what is the chance of it?
What type of clouds will their be (low / med / high altitude clouds) and how much?
What is the temperature going to be? Will I need to bring any weatherproof gear, like a rain jacket or gloves?
Visibility or fog? Often at times fog can work really well when it comes to creating a subject separation. However, visibility is the main focal area in this situation. Visibility is important when shooting longer focal length over long distances. Don’t forget that heat might impact your image quality too.
And very importantly, wind. How much wind will impact the long exposed shot? Is my tripod / setup enough with these wind conditions or do I need to wait for another day? Do I need to expose longer for streaking clouds or if there is more wind do I need to shorten my exposure?
Prep your bag
Finally I pack my bag with all the gear I know I’ll be needing. In this case I make sure I’ve got everything ready for when a free / good day arrives. Batteries charged. Remember to also charge batteries for the remote shutter cable (it’s the worst when you’re all setup and your remote stops working before getting to the actual exposures). Camera packed with the 24 mm tilt shift lens attached. I even mount the 100 mm NiSi filter system ring on the lens so I don’t need to do that in the field. I clean the lens and filter(s) that I’ll bring (mostly a wide variety to keep that flexibility in the field especially with semi cloud coverage). Last but not least I’ll attach the tripod onto my bag.
With me so far?
Architectural fine art photography gives us a reason to go out into the world and find something that we wish to reflect back or change. We choose a subject that we wish to mirror, delve deep into the meaning behind the character and transform it into something different. Not only does it allow us to see a building in all its glory but, architectural fine art photography gives us the opportunity to take a scene from reality and reveal its narrative through our own unique vision. So the question is, how are you contributing to that story? What inspires you?
Stay tuned for my next blog post which will cover exactly how I capture the moment, as I stand facing the great architectural sensation of the Amsterdam Central Station.